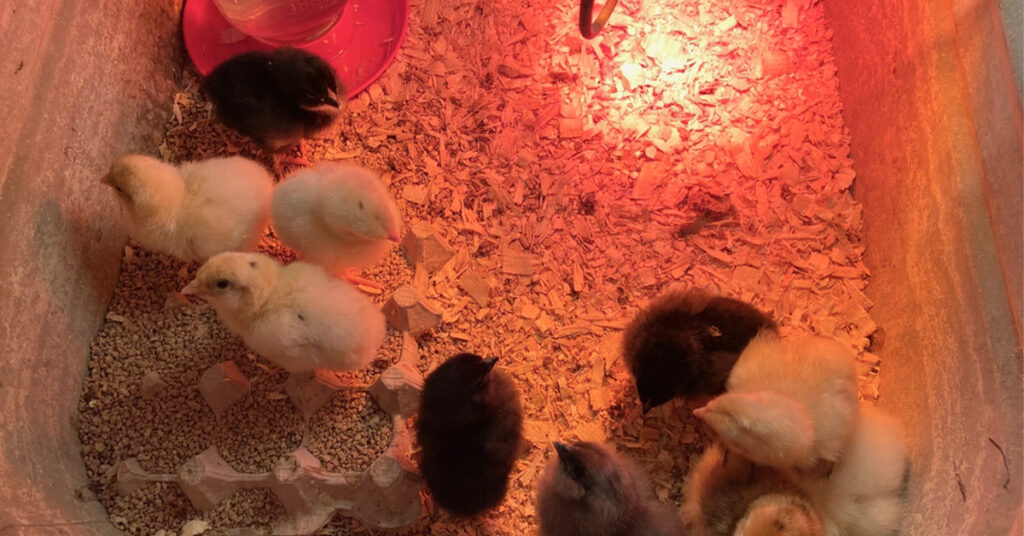
After you hatch eggs or bring home chicks, the most important thing to do is to keep them in a nice and clean environment with the right temperature and access to food and water. I love hatching eggs. Then, I keep my chicks in a brooder to ensure they have a comfortable place with food and water to thrive during the early stages of life. A brooder is simply a controlled environment for your baby chicks until they are big enough to be moved to a coop.
No matter if you haven’t set up a brooder before, I will guide you step by step through everything you need to do to set up a brooder at a low cost.
You will need to do these 5 things to raise your baby chicks in a brooder. You are going to learn about:
- Setting up brooder
- Set bedding
- Heating and light
- Arrange food
- Provide clean water
1. SETTING UP BROODER
You have multiple options for a brooder. You can buy a commercial brooder or you can make your own using cardboard, a plastic box, a wooden box, or anything that can properly enclose the space. I always prefer an inexpensive setup with cardboard for a small number of chicks. However, if you are raising 50 or more, you will need more space. My advice is to keep at least 2 square feet of space per chick. Though they don’t need much space in the first couple of weeks, they will need more as they grow between 6-8 weeks.
I usually buy cardboard for the outer part or walls of the brooder. Most of the time, I stick 6-8 panels together to create enough inner space, and that’s it—your brooder outline is complete. With cardboard, you can easily increase or decrease the size according to the number of chicks you have.
You also need to consider ventilation. For proper ventilation in your brooder, you can add small holes or cutouts on the sides or top of the container, ensuring they are high enough to avoid drafts directly on the chicks. You can also use a breathable mesh lid or loosely cover the brooder to allow air circulation while maintaining warmth inside. Avoid placing the brooder in drafty areas.
2. SET BEDDING
After setting up the outline, the next thing to do is to set up comfortable bedding. Chicks poop a lot, which can make the floor slippery and wet. You need to make sure the ground surface is not slippery, or your chicks could develop deformed feet.
To make the floor comfortable, I first lay down a soft cloth, then add pine shavings. Pine shavings are safe for chicks. However, there are other options such as rice husk, wood shavings, straw, hay, grass clippings, dried leaves, or clean sand. Put about 1 inch of pine shavings or your preferred bedding on the floor. Keep in mind, never use cedar shavings as they contain oils that can be harmful to a chick’s growth. I monitor the brooder daily, and if water has spilled on the floor, I change the pine shavings. I change all the bedding once every two weeks for my small brooder.
3. HEATING AND LIGHT
Proper heating and lighting are crucial for your chicks’ health. You have two main options for providing heat: an electric heat panel or a heat lamp. Both require careful setup to ensure safety.
If you choose an electric heat panel, you’ll also need a lamp to provide light, as chicks can’t see in the dark. Avoid white light, as it can disturb their sleep. A red bulb is a better choice because it provides enough light while allowing the chicks to rest peacefully.
If you prefer to use a heat lamp, make sure to install it with a metal shade and place it at a safe distance from the bedding. Heat lamps can be dangerous if they get too close to the bedding material, as they could cause fires. Always ensure the lamp is securely placed to avoid accidents.
Start by keeping the brooder temperature at 95°F, and reduce it by 5°F every week until it reaches 75°F. Monitoring the temperature regularly will help keep your chicks comfortable.
4. ARRANGE FOOD
Once you have everything set up, the next thing to do is to provide food. Keep in mind that you will need chick-sized feeders for both food and water. Baby chicks won’t be able to reach the food if you use a large feeder. I use chick-sized feeders to make it easier for them to access their food and water.
Fill the feeder with chick feed and check it multiple times a day. Chicks eat and poop a lot, so the feeder can quickly become dirty with bedding material and poop. Be sure to clean it daily to maintain a healthy environment. Chicks also eat grains, seeds, pulses, fruit, and vegetable scraps. Sometimes, you can offer these along with their feed.
5. PROVIDE CLEAN WATER
Baby chicks must have clean and fresh water available at all times. Do not give water in a bowl, as chicks can drown in it and dirty the water quickly. Instead, provide them with chick-sized water dispensers. Changing the water and cleaning the dispensers daily is vital for your chicks’ health. More importantly, it helps prevent the spread of disease.
Be cautious about adding anything to the water. Research thoroughly or consult a vet before giving them any supplements or medicine. I care about your birds 😊.
That’s enough information to set up a brooder for your chicks. I’d love to hear about your chick-raising journey. Are you going to build a brooder?

